Django 01편 - Hello World!
들어가기 전…
쾌적한 개발을 위해 Anaconda를 이용해 가상인터프리터를 사용한다.
1
2
conda create --name django_env python=3.9
conda activate django_env
Django 시작하기
- django 설치하기
1
pip install django - django 프로젝트 생성하기
1
2
django-admin startproject django_demo
cd django_demo
django-admin 명령어로 만들어진 프로젝트 안에 manage.py가 있음
- database migrate
1
python manage.py migrate
run server
1
python manage.py runserver 8000
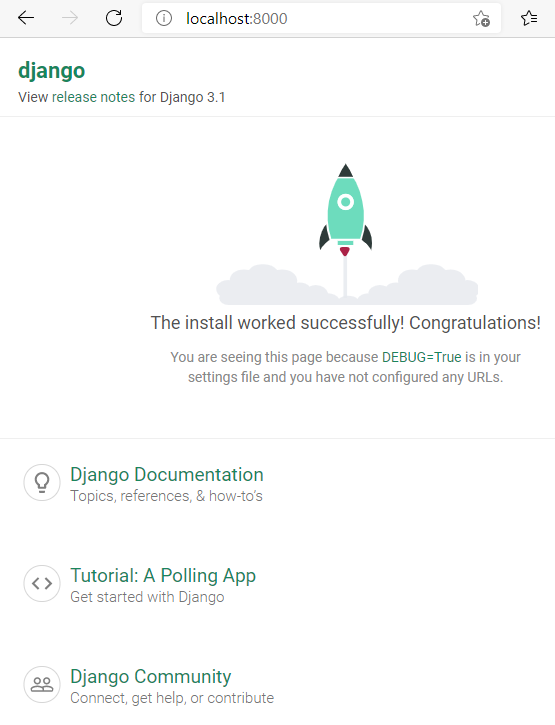
성공적으로 django가 동작한다 :)
app을 달고 hello world!
- apps 폴더 생성
1
mkdir apps
app 생성
1 2
mkdir django_demo/apps/test_app django-admin startapp test_app django_demo/apps/test_app- 생성할 app 이름은 test_app
- 레파지토리의 루트에서 실행한 명령어
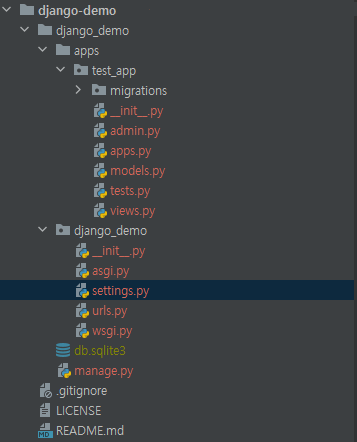
파일구조는 이런식으로 된다.
- settings.py 수정
1
2
3
4
5
6
7
8
9
INSTALLED_APPS = [
    'django.contrib.admin',
    'django.contrib.auth',
    'django.contrib.contenttypes',
    'django.contrib.sessions',
    'django.contrib.messages',
    'django.contrib.staticfiles',
    'apps.test_app',
]
INSTALLED_APPS에 생성한 app을 추가해준다.
views.py 수정
1
2
3
4
5
6
from django.http import HttpResponse


# Create your views here.
def hello_world_view(request):
    return HttpResponse("Hello world")
testapp 폴더에 urls.py 생성
1
2
3
4
5
6
from django.urls import path
from apps.test_app import views as test_app_views

urlpatterns = [
    path('hello-world/', test_app_views.hello_world_view, name='hello_world'),
]
프로젝트의 urls.py에 testapp urls 추가
1
2
3
4
5
6
7
8
9
10
11
12
13
14
15
16
17
18
19
20
21
22
"""django_demo URL Configuration

The `urlpatterns` list routes URLs to views. For more information please see:
    https://docs.djangoproject.com/en/3.1/topics/http/urls/
Examples:
Function views
    1. Add an import:  from my_app import views
    2. Add a URL to urlpatterns:  path('', views.home, name='home')
Class-based views
    1. Add an import:  from other_app.views import Home
    2. Add a URL to urlpatterns:  path('', Home.as_view(), name='home')
Including another URLconf
    1. Import the include() function: from django.urls import include, path
    2. Add a URL to urlpatterns:  path('blog/', include('blog.urls'))
"""
from django.contrib import admin
from django.urls import path, include

urlpatterns = [
    path('admin/', admin.site.urls),
    path('test/', include('apps.test_app.urls')),
]
- run server

1
python manage.py runserver 8000
딱히 데이터베이스를 추가하거나 한게 아니기 때문에 migrate는 필요없다. 그냥 서버 돌려주면 된다.
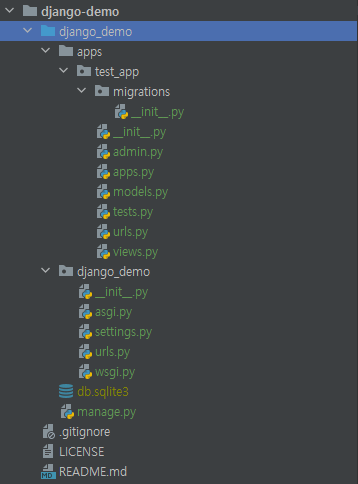
결과물 파일 구조
여기까지의 파일 구조는 이렇다.
이 기사는 저작권자의 CC BY 4.0 라이센스를 따릅니다.


